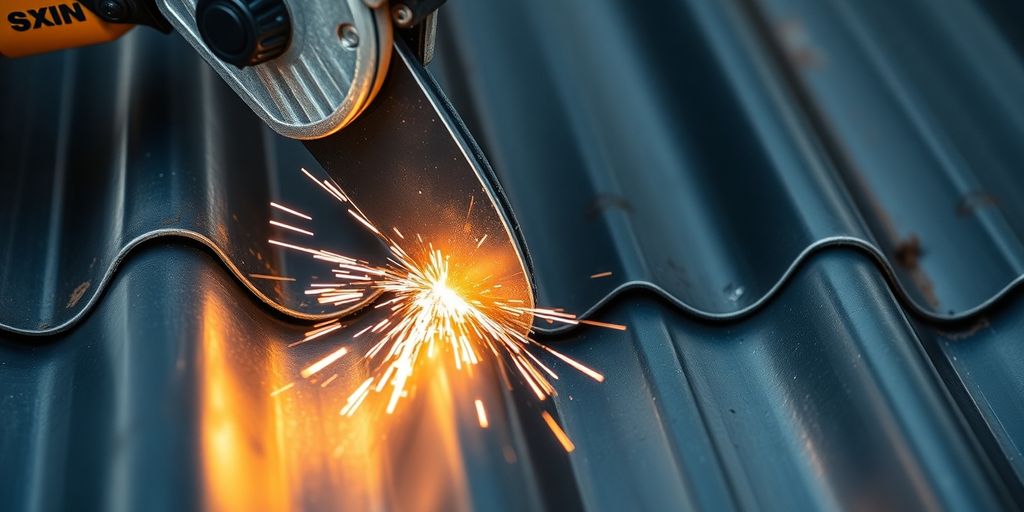
Putting up a metal roof can be a big project, and getting the metal sheets to fit just right means you’ll need to do some cutting. It’s not as simple as just grabbing any old saw. You need the right metal roofing tools to make sure your cuts are clean and accurate, which is super important for a good seal and a roof that lasts. Let’s talk about what you’ll need to get those metal panels shaped up properly.
Key Takeaways
- Always wear safety glasses and gloves when cutting metal roofing to protect yourself from sharp edges and flying debris.
- Accurate measurements and clear markings on the underside of the metal sheets are vital for precise cuts.
- Tin snips, especially aviation snips, are great for shorter cuts and details, with different colors indicating cutting direction.
- For longer runs or faster work, power shears or a circular saw with a metal-cutting blade are good options.
- Secure your metal sheets firmly to a stable surface before cutting to prevent movement and ensure accuracy.
Essential Safety Gear for Cutting Metal Roofing
When you’re cutting metal roofing, safety really needs to be your number one priority. It’s not like cutting wood or plastic; metal can be sharp, and the process creates little bits of metal that can fly off. You absolutely have to protect yourself.
Eye Protection is Paramount
Seriously, don’t skip this. When you cut metal, tiny metal shavings, sometimes called swarf, go everywhere. If one of these gets in your eye, it’s going to be a really bad day. You need to wear safety glasses or goggles that fit snugly. Regular eyeglasses aren’t going to cut it. Make sure they wrap around your eyes or have side shields. A full face shield over your safety glasses is even better, especially if you’re using power tools. It’s better to be a little over-protected than to end up with a metal sliver in your eye.
Protect Your Hands and Body
Besides your eyes, your hands are going to be doing a lot of the work, and they’re also at risk. You’ll want a good pair of work gloves. Not thin gardening gloves, but sturdy ones that can handle rough material and sharp edges. Long sleeves and pants made of durable fabric, like denim or canvas, are also a good idea. This protects your arms and legs from accidental scrapes and cuts. Think about it: you’re handling sheets of metal that have just been cut, and those edges can be surprisingly sharp. It’s a good idea to have a few pairs of gloves on hand, as they can get dirty or damaged.
Here’s a quick rundown of what you should have:
- Eye Protection: Safety glasses or goggles (wrap-around style preferred).
- Hand Protection: Durable work gloves.
- Body Protection: Long-sleeved shirt and long pants made of sturdy material.
Always inspect your safety gear before you start cutting. Make sure there are no holes in your gloves or cracks in your glasses. It’s a small step that makes a big difference.
Precise Marking and Measuring for Cuts
Getting your measurements right before you start cutting metal roofing is super important. Even a tiny mistake can lead to gaps, and nobody wants a leaky roof, right? So, let’s talk about how to make sure your cuts are spot on.
Accurate Measurements Are Key
Before you even think about picking up a tool, you need to know exactly what you’re cutting. This means measuring your roof area carefully. Figure out how many panels you’ll need and what size each one should be. A good way to do this is to divide your total roof area by the size of a single roofing sheet. Always double-check your numbers; it’s way easier to measure twice and cut once than to deal with a wrongly sized panel.
Marking Your Cut Lines
Once you’ve got your measurements, it’s time to mark the metal. Lay your roofing sheets on a flat, stable surface. If you’re working with ridged panels, it’s usually best to have the underside facing up. The flatter surface there makes it easier to see your marks and get a cleaner cut. Use a tape measure and a permanent marker to plot out where you need to cut. For extra precision, a combination square can give you a nice, straight guideline. Make sure your lines are clear and easy to follow.
Keeping your metal sheets steady while you mark and cut is also a big deal. You can use clamps to hold them down, or even place some weights on the edges. This stops the metal from shifting, which could mess up your measurements and lead to a bad cut. It’s all about stability to get those perfect lines.
When you’re marking, remember that different tools have different kerf widths (that’s the width of the cut itself). For example, a standard circular saw blade might cut about 1/8 inch wide, but you can modify a blade to cut a thinner line, around 1/16 inch. This detail matters for really precise work, especially if you’re cutting multiple sheets at once. For most jobs, though, a clear marker line is all you need. If you’re looking for some good cutting tools, check out what Malco has to offer.
Handheld Metal Roofing Tools for Straight Cuts
When you need to make straight cuts on metal roofing panels, a few trusty handheld tools will get the job done. These are the workhorses for most of your cutting tasks, especially for shorter runs or when you need to trim edges.
Choosing the Right Tin Snips
Tin snips, also known as aviation snips, are your go-to for cutting sheet metal. They come in different colors, and each color is designed for a specific type of cut. Yellow-handled snips are perfect for straight cuts, making them ideal for trimming panels to size or cutting along a straight line. Red-handled snips are for left-handed cutting (counterclockwise), and green-handled snips are for right-handed cutting (clockwise). For general straight cuts, stick with the yellow ones. It’s good to have a comfortable pair that feels right in your hand, as you’ll be using them a lot.
Using Aviation Snips Effectively
To get a clean, straight cut with your tin snips, take your time. Align the snips with your marked cut line and squeeze the handles smoothly. Don’t try to force the cut; let the snips do the work. For cutting out a hole, like for a vent pipe, you’ll first need to drill a small pilot hole. Then, insert one blade of the snips into the hole and carefully snip your way along the marked circle. It takes a bit of practice, but you’ll get the hang of it quickly. Remember to work slowly and deliberately to keep your cuts precise.
Working with tin snips can be a bit tiring on your hands, especially for longer cuts. If you find your hands getting fatigued, consider taking short breaks or switching to power shears for larger jobs. It’s all about finding a balance that works for you and the task at hand.
Power Tools for Efficient Metal Cutting
When you’ve got a lot of metal roofing to cut, especially for longer runs or multiple sheets, power tools really save the day. They make the job go much faster and can be easier on your hands than manual snips.
Power Shears for Longer Runs
Power shears are fantastic for making those long, straight cuts. They’re either electric or pneumatic, and honestly, they’re a lot kinder to your hands than wrestling with tin snips for extended periods. You just line up the shears with your mark, squeeze the trigger, and go. Keep it slow and steady to stay on your line.
Circular Saws for Multiple Sheets
If you need to cut through several sheets at once, a circular saw is your best bet for speed. Stack your metal sheets, clamp them down tight, and double-check that you really want them all cut to the same length. Remember to wear your safety gear – goggles, a dust mask, and earplugs are a must. Make sure you’re using a blade specifically designed for cutting metal, like one with steel or carbide teeth. Line up your saw, pull the trigger, and guide the blade along your cut mark. It’s a good idea to have a blade that’s been modified to cut a thinner kerf, about 1/16 inch, which makes the cutting process much smoother and easier on the blade itself. You can find a good selection of these specialized tools at places that sell metal roof cutting tools.
Drills for Starting Cuts
Sometimes, you need to cut a hole in the middle of a panel, maybe for a vent pipe. That’s where a drill comes in handy. You’ll want to start by drilling a pilot hole, usually with a 1/2-inch metal cutting bit, right in the center of the area you want to cut out. Once you’ve got that hole, you can insert the tip of your snips or a blade into it to start your cut. This makes it much easier to get started without damaging the surrounding metal.
Using power tools means you’re dealing with more force and speed. Always prioritize safety and make sure you’re comfortable with the tool before you start cutting. Taking your time and using the right tool for the job will make all the difference in getting clean, accurate cuts.
Supporting Your Metal Roofing Cuts
When you’re cutting metal roofing, having a stable setup is super important. You don’t want your metal sheets sliding around while you’re trying to make a clean cut. It’s all about making sure your material is secure so you can get those precise measurements and cuts we talked about earlier.
Stable Work Surfaces
Think about setting up a sturdy workbench or even a couple of sawhorses with a flat piece of plywood on top. The goal is to have a surface that’s level and won’t wobble. This gives you a solid foundation to work from. If you’re cutting longer pieces, you might need to extend your support so the metal doesn’t sag off the edge. A good setup means fewer mistakes and a much safer experience.
Securing Your Metal Sheets
Once you have your stable surface, you’ll need to keep those metal sheets from moving. Clamps are your best friend here. You’ll want a few good clamps to hold the metal firmly in place against your workbench or sawhorses. Make sure the clamps are positioned so they don’t interfere with your cutting line. If you’re using a circular saw or power shears, you’ll want to clamp the sheet down really well. For hand snips, a firm grip might be enough, but clamping is always a safer bet, especially for longer cuts. This prevents the metal from shifting mid-cut, which can ruin your line and potentially cause an accident. Having the metal secured properly is key to getting a clean edge and a professional finish on your roof.
Specialty Tools for Metal Roofing Details
Beyond the basic cuts, metal roofing often requires some specialized tools to get those finer details just right. These aren’t always for cutting, but they help shape and secure the metal for a really professional finish.
Bending and Seaming Tools
When you’re working with metal roofing, especially standing seam profiles, you’ll need tools to create those crisp bends and secure seams. Hand seamers are a must-have for mechanical seam panels. You’ll typically need a single-lock or double-lock seamer, and these are often specific to the seam profile you’re using – like one for a 1-inch seam and another for a 2-inch seam. Even if you’re using a power seamer for the bulk of the work, you’ll still want a hand seamer for the beginning and end of each panel, and around clips. Other helpful bending tools include flangers, which are great for creating specific details and bending metal edges. Duckbill flangers are a classic choice, giving you good control over the pressure applied. You might also find a hand roller or a hemming folder useful for specific edge treatments.
Fastening Tools for Secure Installation
Once your metal is cut and shaped, you need to fasten it securely. A good screw gun or drill is vital here. Look for one with torque control; this helps you set screws to the right depth and prevents stripping the screw head or the hole, which is called a “spin out.” Impact drivers can be too powerful and might fracture screws without you realizing it, so a torque-controlled tool is a better bet for exposed fastener systems. For certain flashing areas, like sidewalls and headwalls, you might need a riveter. Standard rivet sizes for projects are often #44 and #43. You can get manual riveters for smaller jobs or powered ones if you have a lot of rivets to set. Having the right fastening tools means your roof will stay put, no matter the weather.
Getting the details right with the proper tools makes a big difference in the longevity and appearance of your metal roof. It’s worth investing in or renting the right equipment for these specific tasks.
Wrapping Up Your Metal Roofing Cuts
So, cutting metal roofing might seem a bit daunting at first, but with the right tools and a little practice, you’ll be fitting those panels like a pro. Remember to always put safety first – those sharp edges and flying bits are no joke! Whether you’re using trusty tin snips for smaller jobs or a power shear for longer runs, having the correct gear makes all the difference. Take your time, measure twice, and cut once. You’ve got this!
Frequently Asked Questions
What safety gear is most important when cutting metal roofing?
When cutting metal roofing, always wear safety goggles to protect your eyes from flying metal bits. Gloves are also a must to prevent cuts from sharp edges. Long sleeves and pants made of tough material will shield your skin.
What kind of snips should I use for different cuts?
For straight cuts, yellow-handled tin snips are best. If you need to cut curves, use red-handled snips for left turns and green-handled snips for right turns. Aviation snips are great all-around tools for metal roofing.
Are power tools like shears or saws better for cutting metal roofing?
Yes, power shears are good for cutting longer sections of metal roofing because they make the job easier and faster than hand snips. A circular saw with a metal-cutting blade is useful for cutting through multiple sheets at once.
How do I make sure my cuts are straight and accurate?
It’s important to measure and mark your cut lines very carefully, usually on the underside of the metal sheet where it’s easier to see. Using a carpenter’s square or speed square helps ensure your lines are straight and accurate.
How do I cut a hole in a metal roofing panel?
You can start a cut in the middle of a panel, like for a vent, by drilling a small hole first. Then, you can insert your snips into the hole to start cutting along your marked line.
How should I secure the metal sheets before cutting?
To keep the metal sheets from moving while you cut, it’s best to secure them. You can use clamps to hold the sheet to a stable workbench or table. Sometimes, adding weights to the edges can also help keep it steady.
