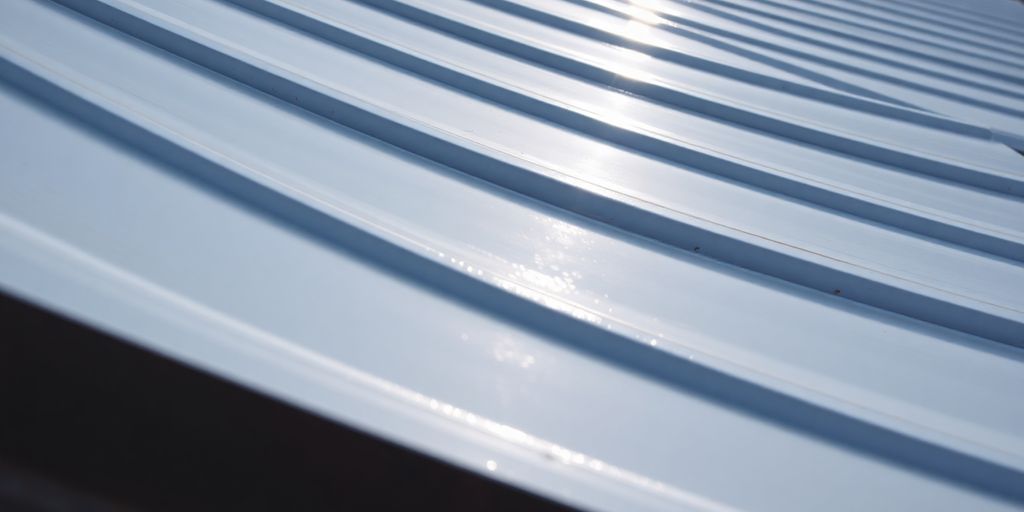
Thinking about giving your metal roof a facelift? You absolutely can paint a metal roof, and it’s a great way to refresh your home’s look and add some protection. It’s not just about slapping on some color, though. You really need to prep the surface right so the paint sticks and lasts. It might seem like a lot, but breaking it down makes it totally manageable. Let’s get your roof looking sharp!
Key Takeaways
- Always check the weather forecast and aim for a dry, mild day with no rain expected for at least 24-48 hours after painting.
- Thoroughly clean your metal roof by power washing away dirt and debris, and scrub away any mold or stubborn grime.
- Remove loose or flaking paint and sand down any rust spots to create a smooth surface for the new paint.
- Apply a high-quality primer specifically designed for metal surfaces to improve paint adhesion and prevent rust.
- Choose paint made for metal surfaces, like acrylic latex or oil-based paint, and apply it evenly, possibly using multiple thin coats for a lasting finish.
Prepare Your Metal Roof for a Fresh Coat
Getting your metal roof ready for a new coat of paint is super important. It’s not just about making it look good, but also about making sure the paint actually sticks and lasts. Think of it like prepping a canvas before you start painting a masterpiece – you wouldn’t just slap paint on a dirty, bumpy surface, right?
Choose the Right Weather for Painting
First things first, you need to pick a good day. You really want to avoid extreme heat or cold, as this can mess with how the paint dries and cures. Ideally, look for a day that’s mild, not too sunny, and definitely not rainy. A nice, dry spell is your best bet. This gives the paint a chance to set properly without getting washed away or baked on too fast.
Gather Your Essential Painting Tools
Before you even think about climbing up there, make sure you have everything you need. You’ll want things like scrapers, wire brushes, a good pressure washer (or at least a sturdy hose and brush), rollers, paint trays, brushes for touch-ups, and of course, your safety gear. Don’t forget protective clothing, gloves, eye protection, and maybe even a mask. Having everything within reach means fewer trips up and down the ladder, which is always a good thing.
Inspect for and Address Existing Damage
Now, take a good, long look at your roof. Are there any loose or peeling bits of old paint? Any spots that look rusty? You need to get rid of all that. Loose paint is just going to peel off with the new coat, and rust can spread if you don’t deal with it. Use a scraper or a wire brush to get rid of any flaking paint. For rust, you’ll want to sand it down until the metal is smooth. This prep work is key to a smooth, long-lasting finish. If you find a lot of rust, you might want to consider a special rust-inhibiting primer for those areas.
Thoroughly Clean Your Metal Roof
Before you even think about grabbing a paintbrush, giving your metal roof a really good clean is super important. It’s not just about making it look nice; it’s about making sure the new paint actually sticks and lasts. Think of it like prepping a canvas before you paint a masterpiece – you wouldn’t start with a dusty, dirty surface, right?
Power Wash Away Dirt and Debris
First things first, you’ll want to blast away all the loose stuff. A pressure washer is your best friend here. Set it to a lower setting, though, so you don’t accidentally damage the metal. You’re aiming to get rid of things like leaves, dust, and any chalky residue that might have built up over time. Make sure you get into all the nooks and crannies. This initial wash is key to removing the surface-level gunk.
Scrub Away Stubborn Grime and Mold
Sometimes, a simple power wash isn’t enough. You might have some stubborn spots, like mold or algae, that need a bit more attention. For these tougher bits, you can use a soft-bristle brush and a cleaning solution. A mix of warm water and a mild dish soap usually does the trick. If you’re dealing with mold or mildew, a solution specifically designed for that, or even a diluted bleach mixture (but be careful with bleach and protect your landscaping!), can help. Just remember to scrub gently to avoid scratching the metal. You want to get it clean, not create new problems.
Rinse and Allow the Roof to Dry Completely
After you’ve scrubbed away all the grime, give the roof a thorough rinse. You want to make sure all the soap and dirt are washed away. Then comes the hardest part: waiting. Your metal roof needs to be completely dry before you can move on to priming or painting. Even a little bit of moisture can cause problems with adhesion later on. Depending on the weather, this could take a few hours or even a full day. It’s better to be patient and wait for it to dry properly than to rush and have your paint job fail. You can check out cleaning solutions for metal roofs for more ideas on what to use.
Address Rust and Old Paint
Remove Loose or Flaking Paint
First things first, you’ve got to get rid of any paint that’s not sticking well. Think of it like prepping a canvas before you paint – you don’t want any old, peeling bits getting in the way. Grab a scraper or even a putty knife and gently work at any areas where the paint is bubbling, flaking, or just looks like it’s about to give up the ghost. It might seem tedious, but doing this properly means your new paint job will actually stick and look smooth, not lumpy. It’s a bit of elbow grease, but it makes a big difference for the final look.
Sand Away Rust Spots for Smoothness
Rust is the enemy of a good paint job, and it can really weaken the metal over time. If you spot any rusty patches, you’ll need to tackle them. A wire brush is your best friend here. Scrub those rusty areas until you get down to bare metal, or at least until the rust is significantly reduced. For a really smooth finish that the new paint can grip onto, you might want to follow up with some sandpaper. Start with a coarser grit if the rust is bad, then move to a finer grit to get it nice and smooth. This prep work is key to preventing rust from coming back through your new paint.
Consider a Rust-Inhibiting Primer for Tough Spots
Now, for those areas where the rust was a bit stubborn, or if your roof has seen better days, a special primer can be a real lifesaver. Look for a primer that’s specifically made for metal and has rust-inhibiting properties. This stuff acts like a shield, stopping any remaining rust from spreading and giving your new paint a solid base to stick to. Apply it according to the product’s instructions, usually in a thin, even coat. Make sure it dries completely before you move on to the next step. It’s an extra step, but it really helps your paint job last longer and keeps that rust at bay. You can find good primers at most hardware stores.
Apply the Necessary Primer
Alright, so you’ve got your metal roof all cleaned up and ready for the next step. This is where we lay down the foundation for that great new paint job. Think of primer as the sticky note that helps your paint really grab onto the metal and stay put for years to come. It’s not just about looks; it’s about protection too.
Select a High-Quality Metal Primer
First things first, you need to pick the right kind of primer. Not all primers are made the same, and for metal roofs, you really want one that’s made specifically for metal surfaces. This is going to help prevent any rust from popping up later and give your topcoat something solid to stick to. If you had any rust spots you dealt with earlier, a good primer is even more important. Some primers are even designed to tackle rust directly, which is a nice bonus.
Apply Primer Evenly for Best Adhesion
Now, let’s get that primer on there. You want to apply it in thin, even coats. Don’t glob it on thick thinking it’ll be better; that can actually cause problems down the road. Whether you’re using a roller, a sprayer, or a brush for those tricky spots, just aim for consistent coverage across the entire roof. Make sure you get into all the nooks and crannies. The goal here is a smooth, uniform layer that covers everything.
Allow Primer to Dry Fully Before Next Steps
This is a waiting game, but it’s important. You’ve got to let that primer dry completely according to the manufacturer’s instructions. Trying to paint over wet primer is just asking for trouble – it won’t stick right, and you’ll end up with a mess. Check the product label for the recommended drying and recoating times. Patience now will save you a lot of headaches later!
Choose and Apply the Right Paint
Now that your roof is prepped and primed, it’s time for the fun part – picking out and putting on the paint! This is where your roof really starts to get its new look. Making the right choice here means your roof will not only look good but also stand up to whatever the weather throws at it.
Select Paint Designed for Metal Surfaces
First things first, you can’t just grab any old can of paint from the hardware store. You need paint that’s specifically made for metal roofs. These paints are formulated to stick well to metal, handle expansion and contraction from temperature changes, and resist fading and chalking from the sun. Using the wrong kind of paint is a recipe for peeling and a short lifespan for your paint job.
Understand the Benefits of Acrylic Latex vs. Oil-Based Paint
When you’re looking at paint for metal roofs, you’ll mostly see two main types: acrylic latex and oil-based. Both have their pros and cons, so it’s good to know the difference.
- Acrylic Latex: These are water-based paints. They’re generally easier to clean up (just soap and water!), dry faster, and are more flexible, which is great for metal that expands and contracts. They also tend to hold their color longer and are less likely to crack. Plus, they’re usually lower in VOCs (volatile organic compounds), making them a bit more environmentally friendly.
- Oil-Based: These paints, also called alkyds, dry slower but often create a harder, more durable finish. They can be really good at blocking stains and providing a strong barrier against moisture. However, they can be trickier to clean up (you’ll need mineral spirits), take longer to dry, and might become brittle over time, leading to cracking.
For most residential metal roofs, acrylic latex is often the preferred choice due to its flexibility and ease of use.
Apply Paint with Rollers, Sprayers, or Brushes
How you put the paint on matters just as much as the paint itself. You want an even coat that covers everything without drips or missed spots.
- Rollers: These are great for covering large, flat areas quickly. Use a roller with a nap that’s appropriate for the surface texture of your roof. Make sure you load it evenly with paint.
- Sprayers: A paint sprayer can give you the most uniform finish, especially on corrugated or textured metal. You’ll need to mask off anything you don’t want painted, and it takes a bit of practice to get the technique right, but the results can be fantastic. Make sure to overlap your passes for full coverage.
- Brushes: Brushes are best for cutting in around edges, seams, fasteners, or any tricky spots where rollers or sprayers can’t reach easily. Use a good quality brush that won’t shed bristles onto your wet paint.
No matter which method you choose, apply the paint in thin, even coats. It’s always better to do two thin coats than one thick one. Let each coat dry completely according to the manufacturer’s instructions before applying the next. This patience will pay off with a much better-looking and longer-lasting finish.
Achieve a Lasting Finish with Sealant
Alright, so you’ve prepped, primed, and painted your metal roof. That’s a huge accomplishment! But we’re not quite done yet. To really lock in that fresh look and give your roof some serious staying power against the elements, we need to talk about sealant. Think of it as the final, protective hug for your roof.
Apply a Thin Layer of Sealant
This is where we add that extra layer of defense. You want to apply a sealant that’s made for metal roofs. It’s usually a bit thicker than paint, and you’ll want to use a good quality brush for this. Work in sections, making sure you get an even coat everywhere. Don’t glob it on; a thin, consistent layer is what you’re aiming for. This helps keep water out and protects your new paint job from UV rays and general wear and tear. It’s a small step that makes a big difference in how long your roof looks great.
Protect Seams and Fasteners
Now, pay extra attention to the seams and any fasteners, like screws or rivets. These are the spots where water likes to sneak in. Use your brush to really work the sealant into these areas. You want to make sure there are absolutely no gaps. This is super important for preventing leaks down the road and keeping your roof in tip-top shape. It’s like sealing up any tiny cracks in a dam – you don’t want any water getting through.
Allow Adequate Drying Time Between Coats
Just like with the primer and paint, patience is key here. If your sealant requires a second coat, you absolutely must let the first coat dry completely according to the manufacturer’s instructions. Rushing this step can cause problems, like the sealant not adhering properly or trapping moisture. Check the product label for specific drying times. Usually, it’s best to wait at least a few hours, or even overnight, depending on the weather. Proper drying ensures the sealant forms a strong, continuous barrier. This whole process might seem like a lot, but taking these final steps will really pay off in the long run, keeping your metal roof looking good and protecting your home for years to come. You can find good sealants at most hardware stores, often designed specifically for metal roofing applications.
You’ve Got This!
So, there you have it! Getting your metal roof ready for a fresh coat of paint might seem like a lot, but taking these steps seriously will make a huge difference. A clean, well-prepped surface means your new paint will stick better and last way longer. Plus, you’ll be protecting your roof from rust and the elements. It’s all about making smart choices now to keep your roof looking good and doing its job for years to come. Grab your gear, pick a nice dry day, and get ready to give your roof a whole new look!
Frequently Asked Questions
What’s the best weather for painting a metal roof?
You should pick a dry day with mild weather, ideally between 50°F and 85°F. Avoid painting when it’s too hot, too cold, or rainy, as this can mess up how the paint dries and sticks.
What tools do I need to paint my metal roof?
You’ll need things like a scraper or wire brush to clean off old paint and rust, sandpaper for smoothing, a pressure washer for dirt, a good quality metal primer, and paint made for metal roofs. Don’t forget safety gear like sturdy shoes and maybe a harness.
Do I really need to clean the roof before painting?
Yes, you absolutely need to clean the roof first. Wash away all the dirt, leaves, mold, or anything else that might be on it. This helps the new paint stick properly and last longer.
How do I deal with rust and old paint on my roof?
It’s super important to get rid of any rust or peeling paint. Use a wire brush or sandpaper to smooth these spots. If there’s a lot of rust, using a special primer that stops rust is a really good idea.
Why is priming my metal roof so important?
Always use a primer made for metal surfaces. It acts like glue, helping the new paint stick better to the metal and giving it an extra layer of protection against rust and the weather.
How long should I wait between coats of paint?
You should wait about 24 to 48 hours between coats of paint, but always check the instructions on the paint can. If it’s humid or wet, you might need to wait even longer so the paint dries correctly.
